

1-Channel Relay Module with Optocoupler – Safely Control 230V Loads from Arduino or Raspberry Pi
Need to switch a pump, light, or motor using a GPIO pin? Without galvanic isolation, a single voltage spike can instantly fry your microcontroller. These optocoupler-equipped relay modules create an electrical barrier between your control logic and your power load — ensuring your pins remain protected, no matter what happens on the high-voltage circuit.
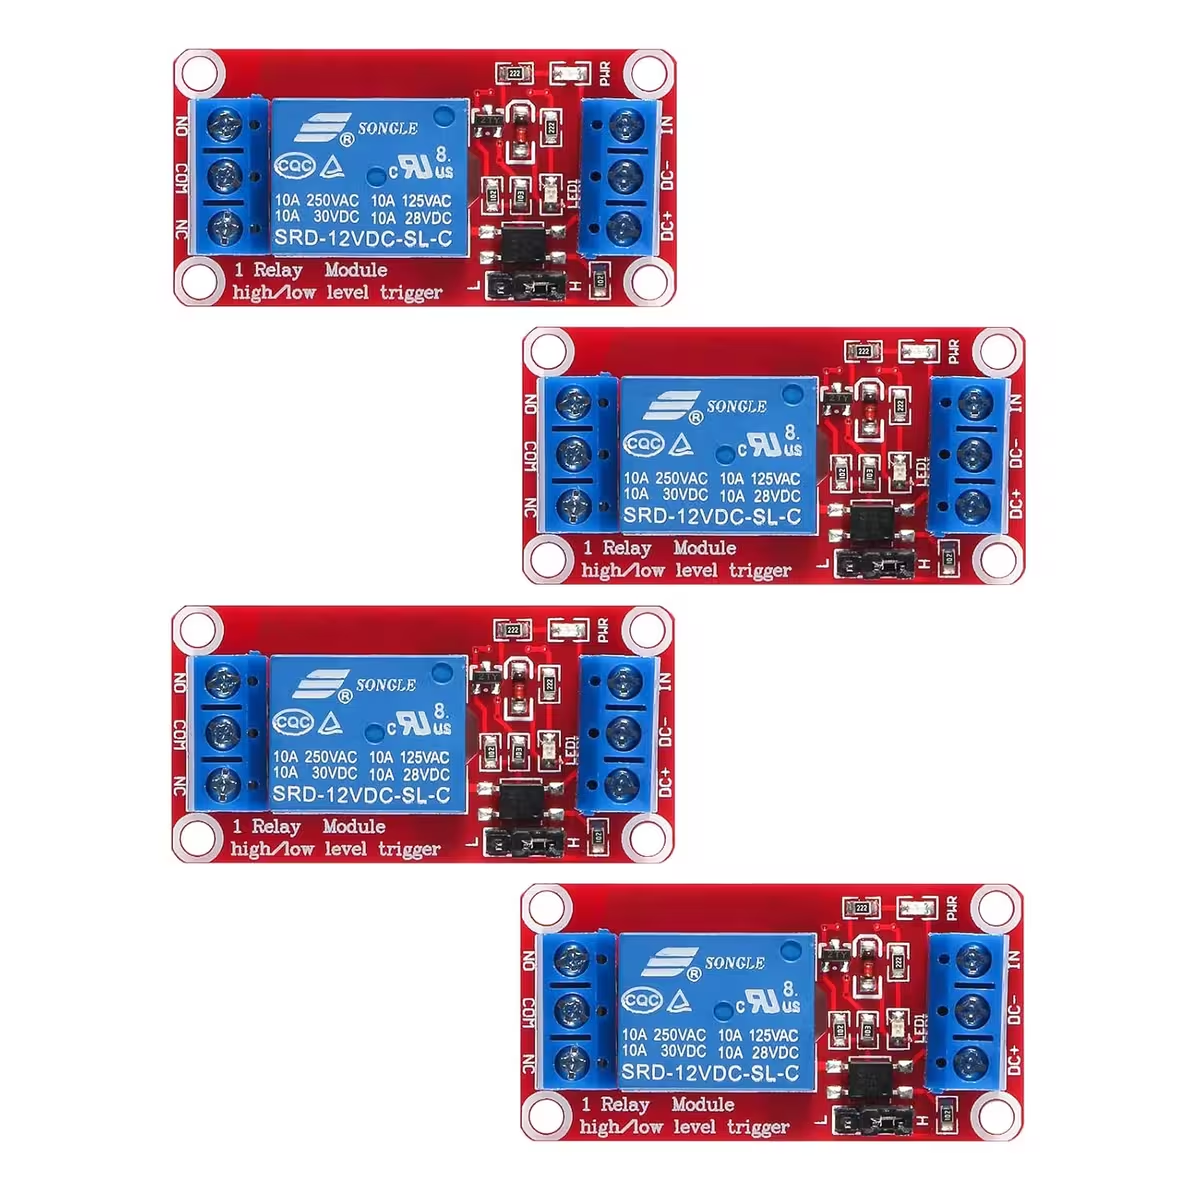
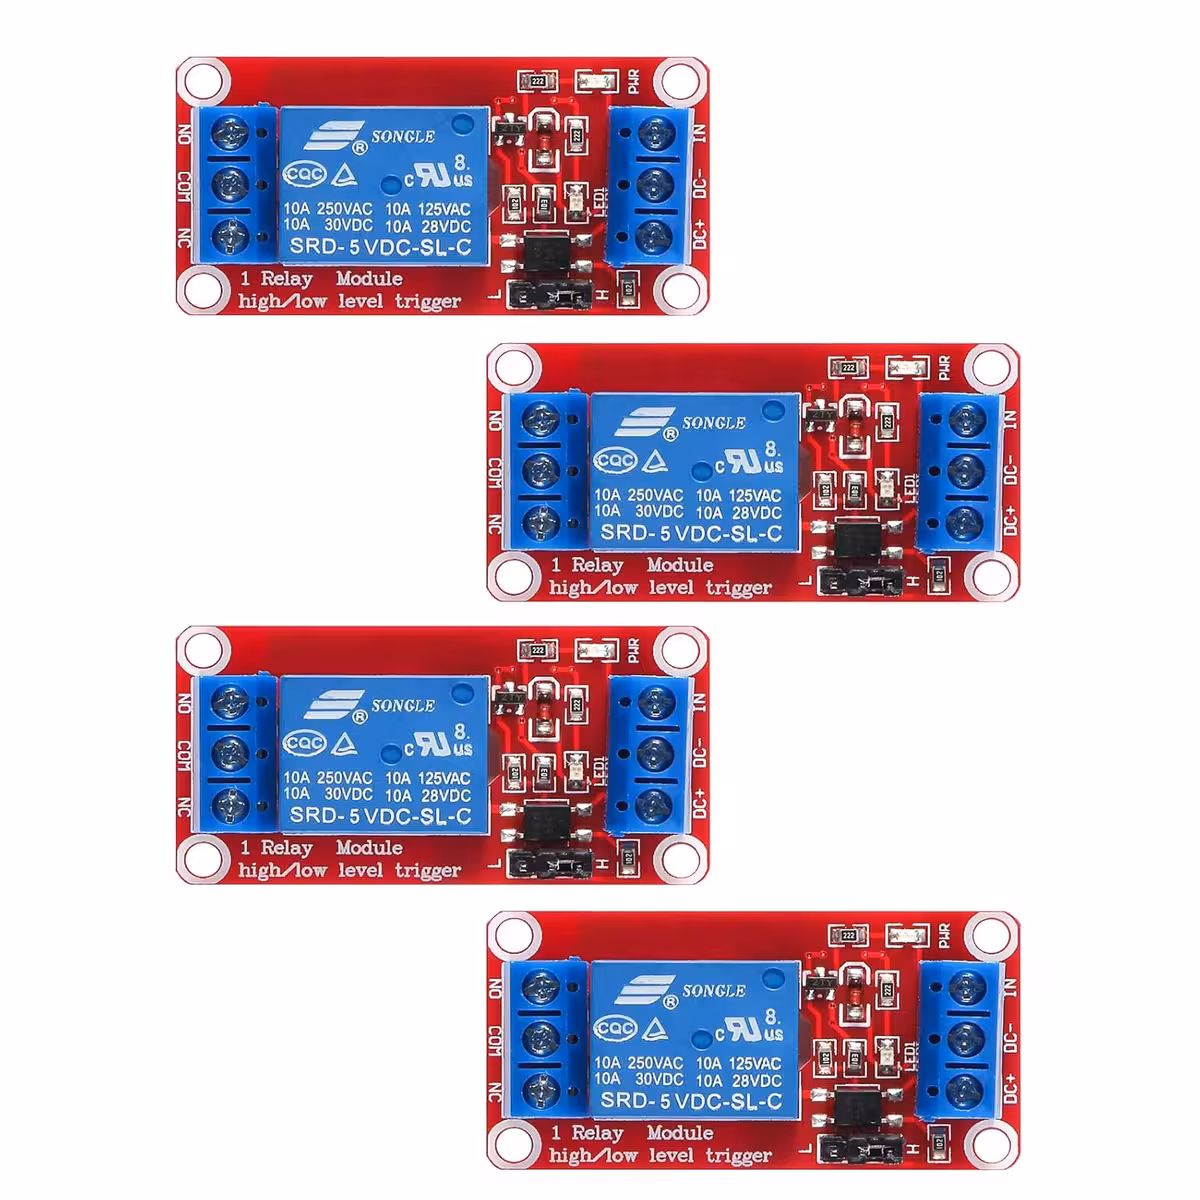
Note: Please select your preferred version at checkout — 5V or 12V relay module. The set includes 4 units of your chosen variant.
Why choose this set? (Key Advantages):
- Galvanic isolation via optocoupler — The control and power circuits are completely separated; a short circuit on the load will never reach your GPIO or digital pins.
- Selectable High/Low trigger via jumper — Switch the activation logic in seconds without re-wiring or changing your source code.
- Fault-tolerant design — If the trigger line is accidentally disconnected, the relay remains in its default state, preventing unwanted load activation.
- 10A contacts for real-world loads — Supports AC 250V/10A and DC 30V/10A; ideal for lights, pumps, fans, and small household or industrial motors.
- Universal compatibility — Works with Arduino, Raspberry Pi, ESP32, ARM, PIC, AVR, CNC, and any platform with a digital output pin.
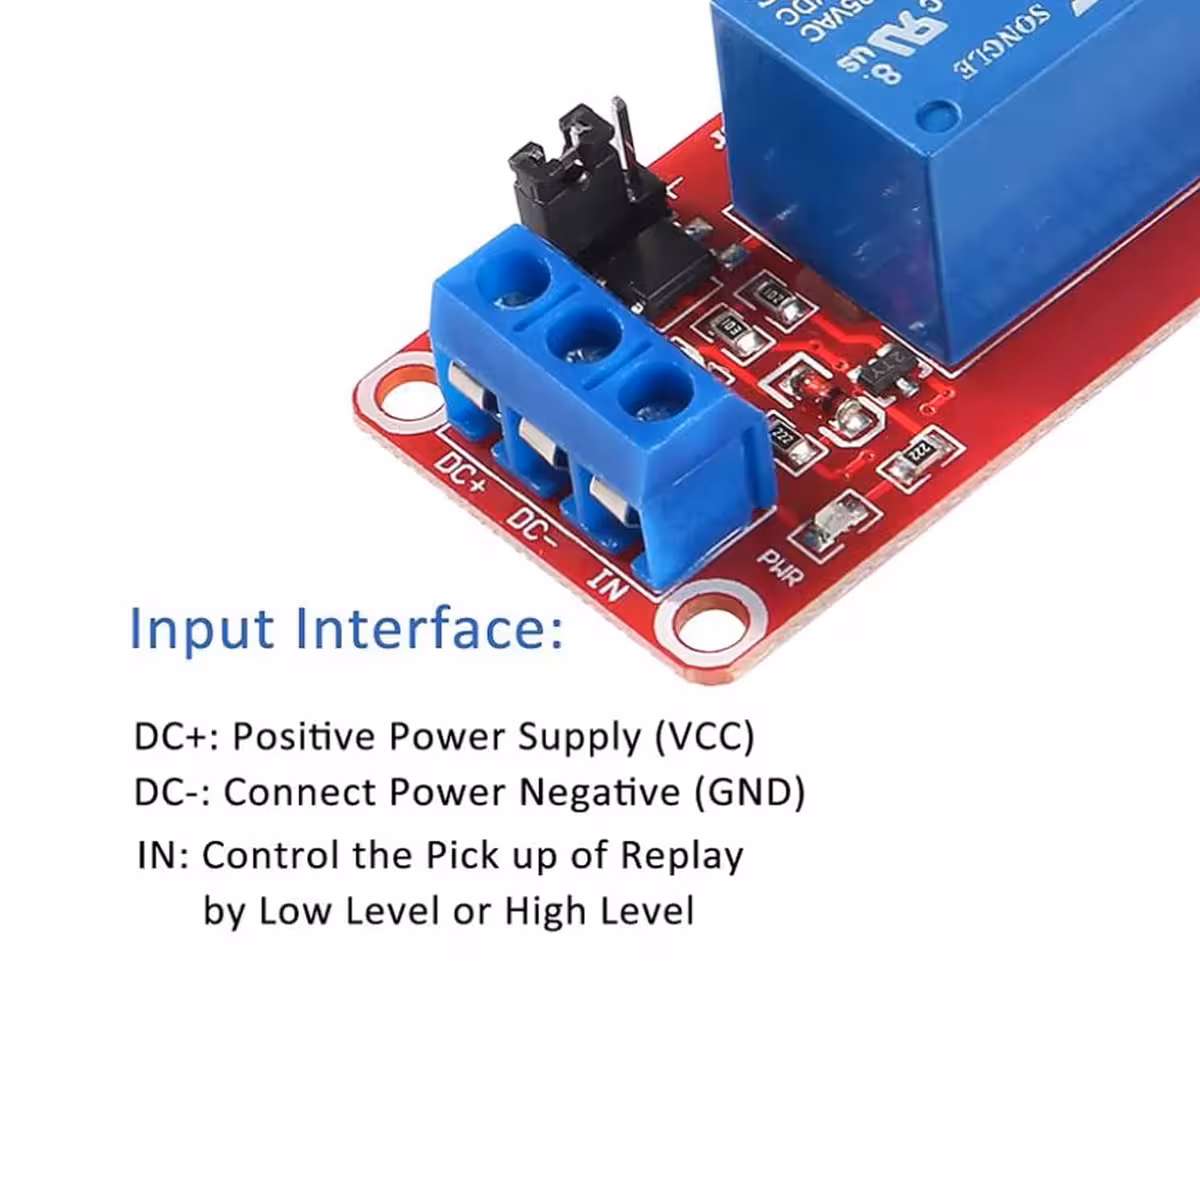
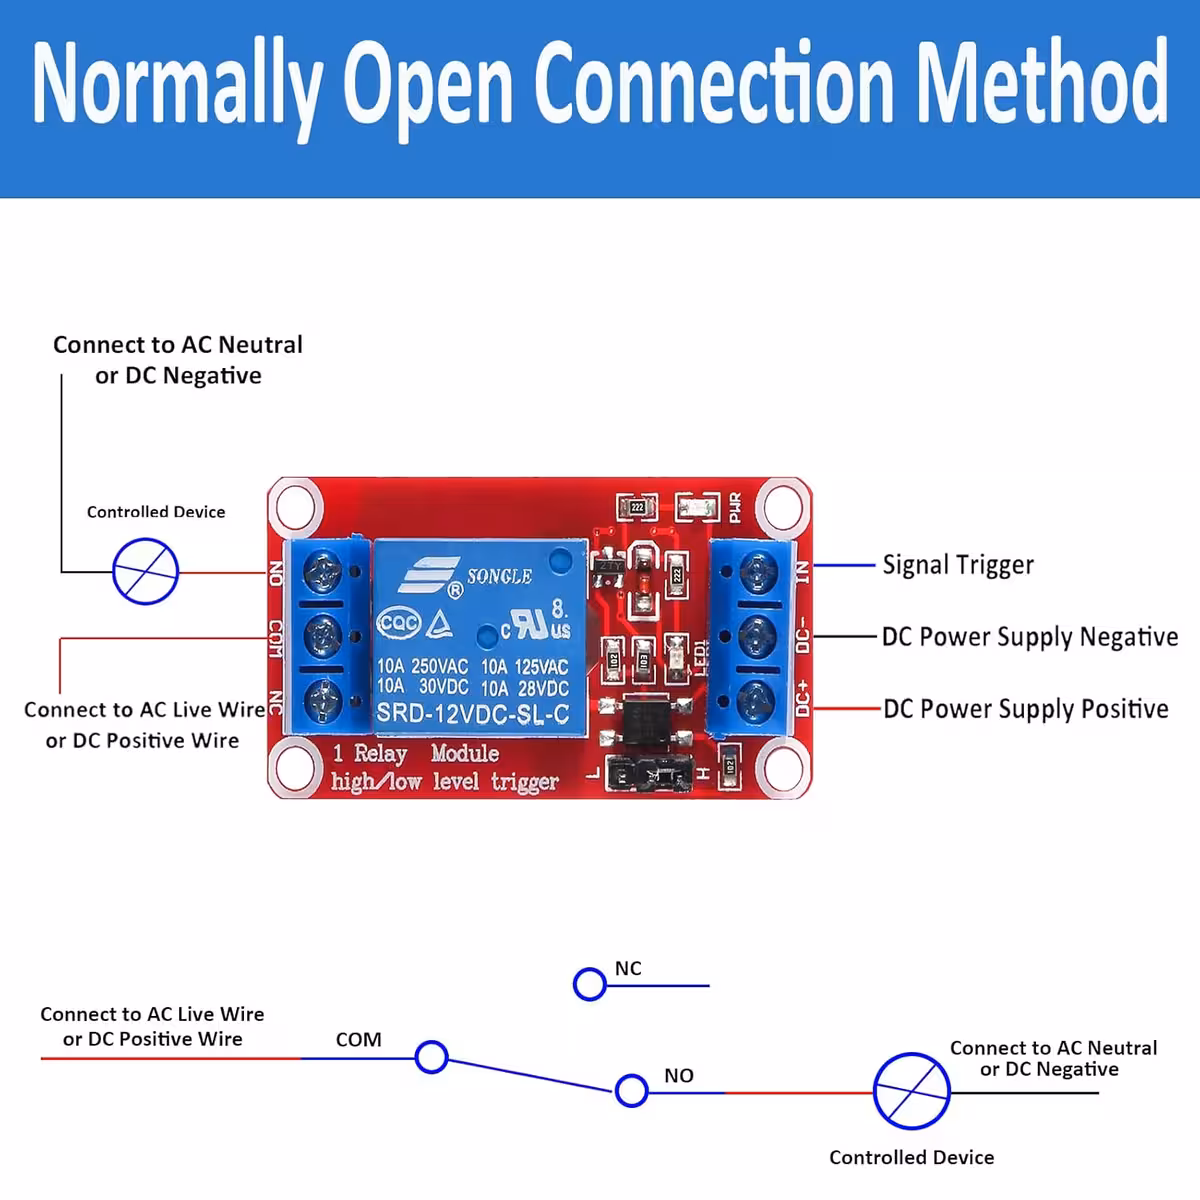
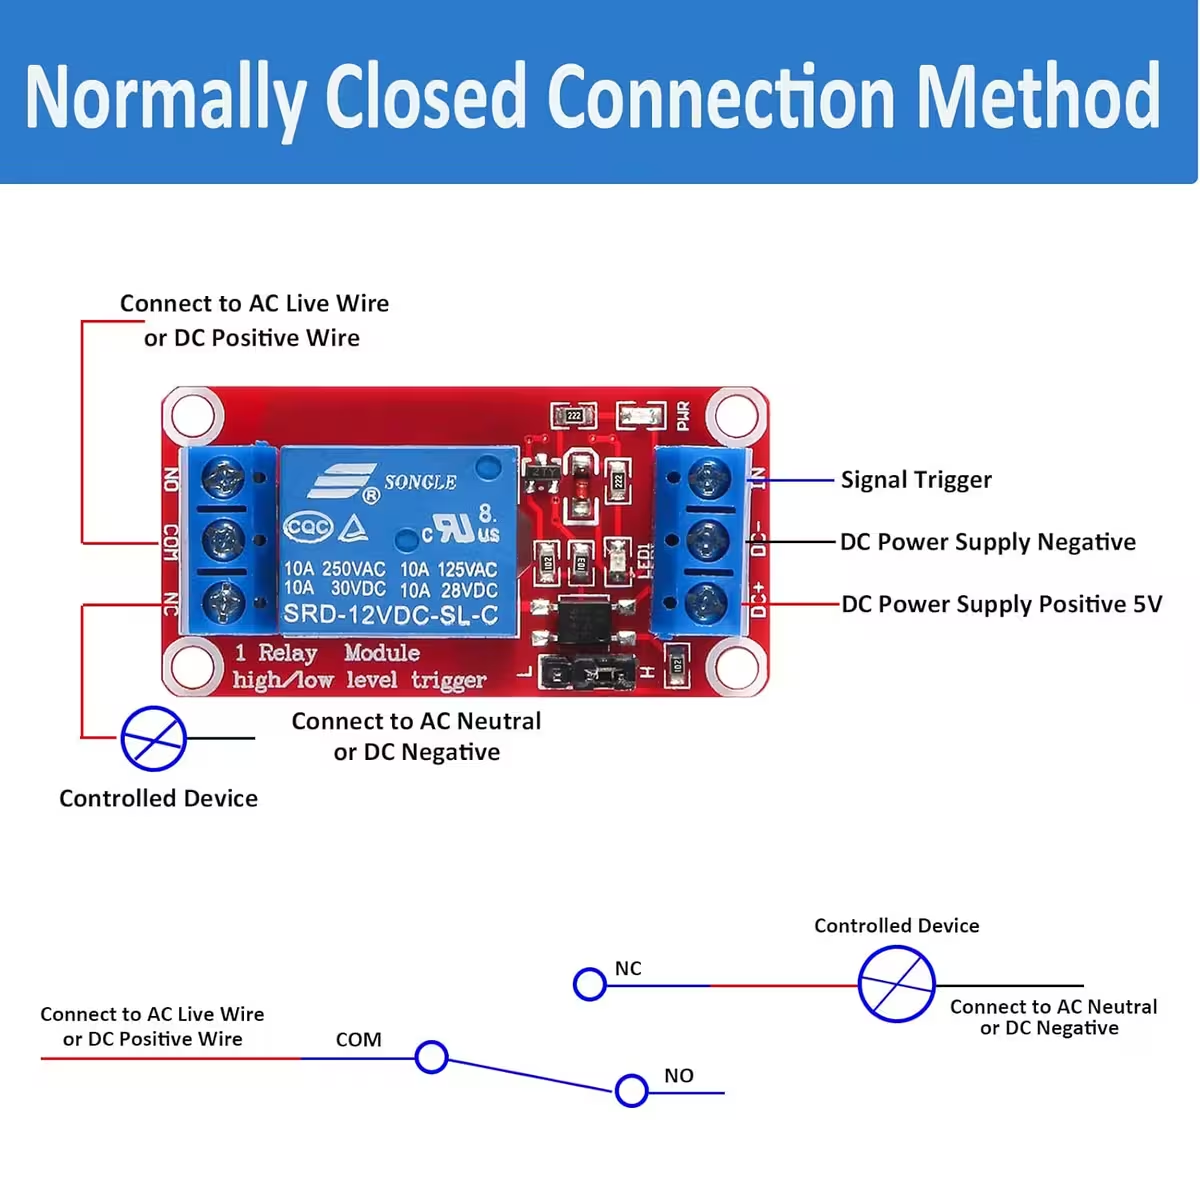
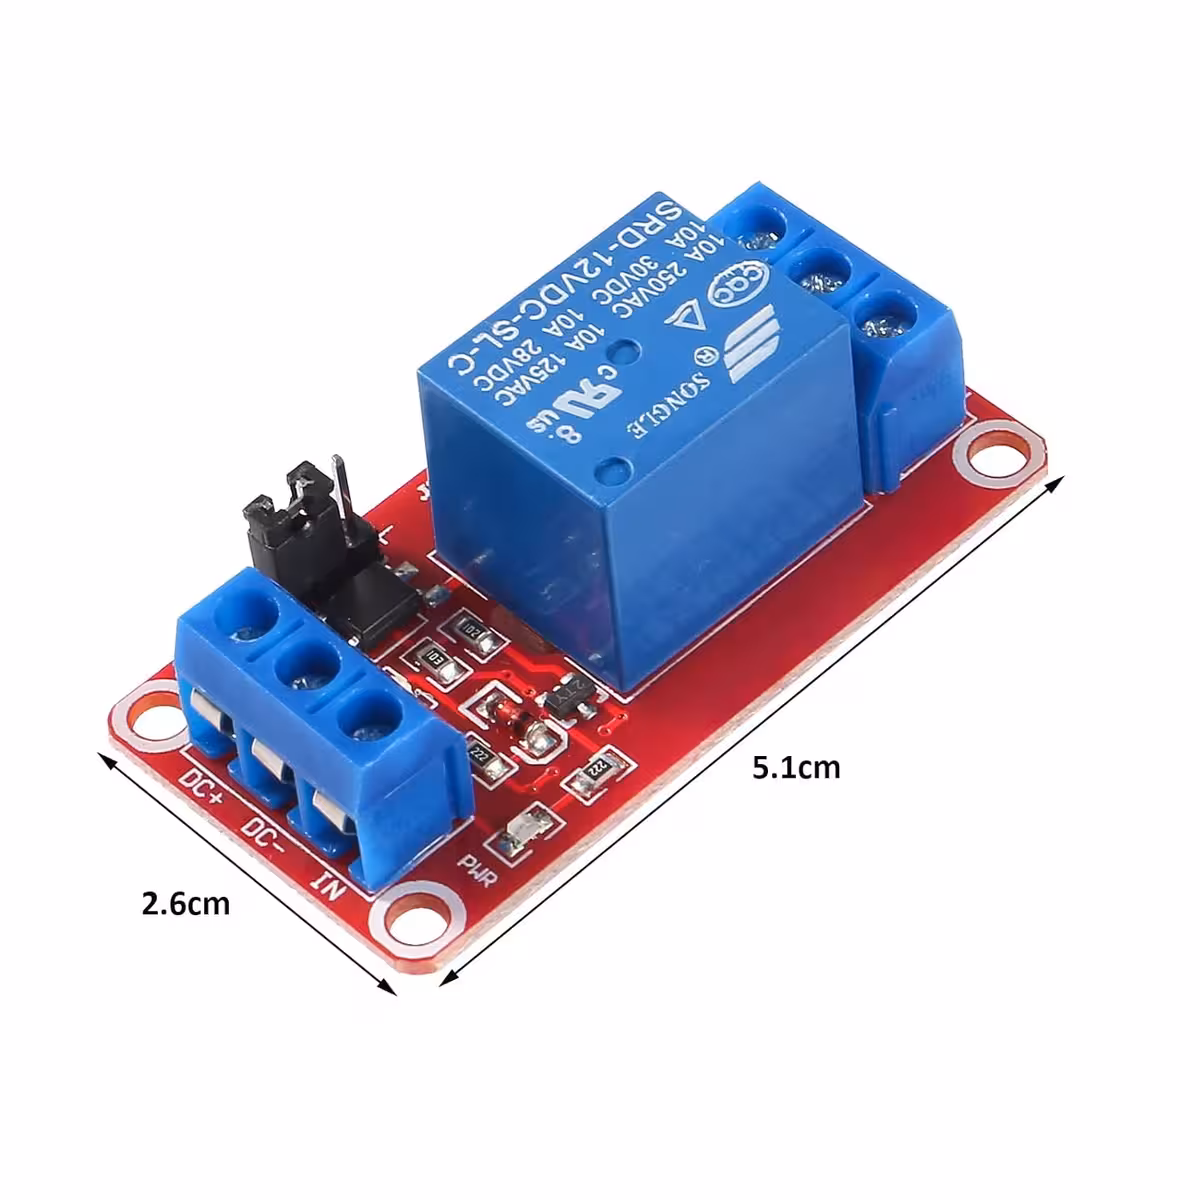
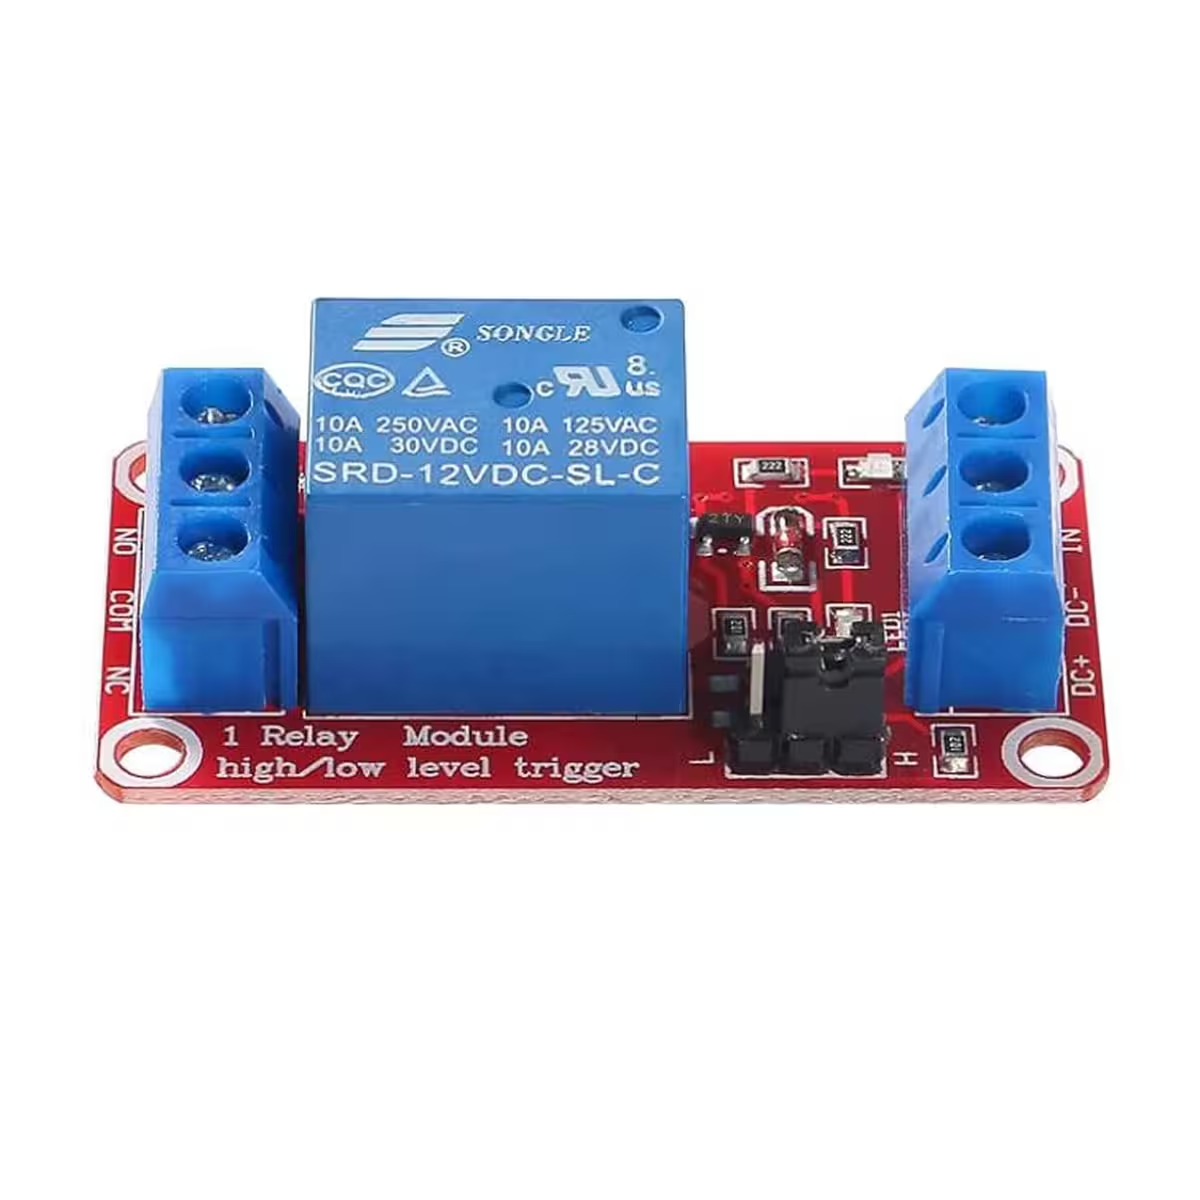
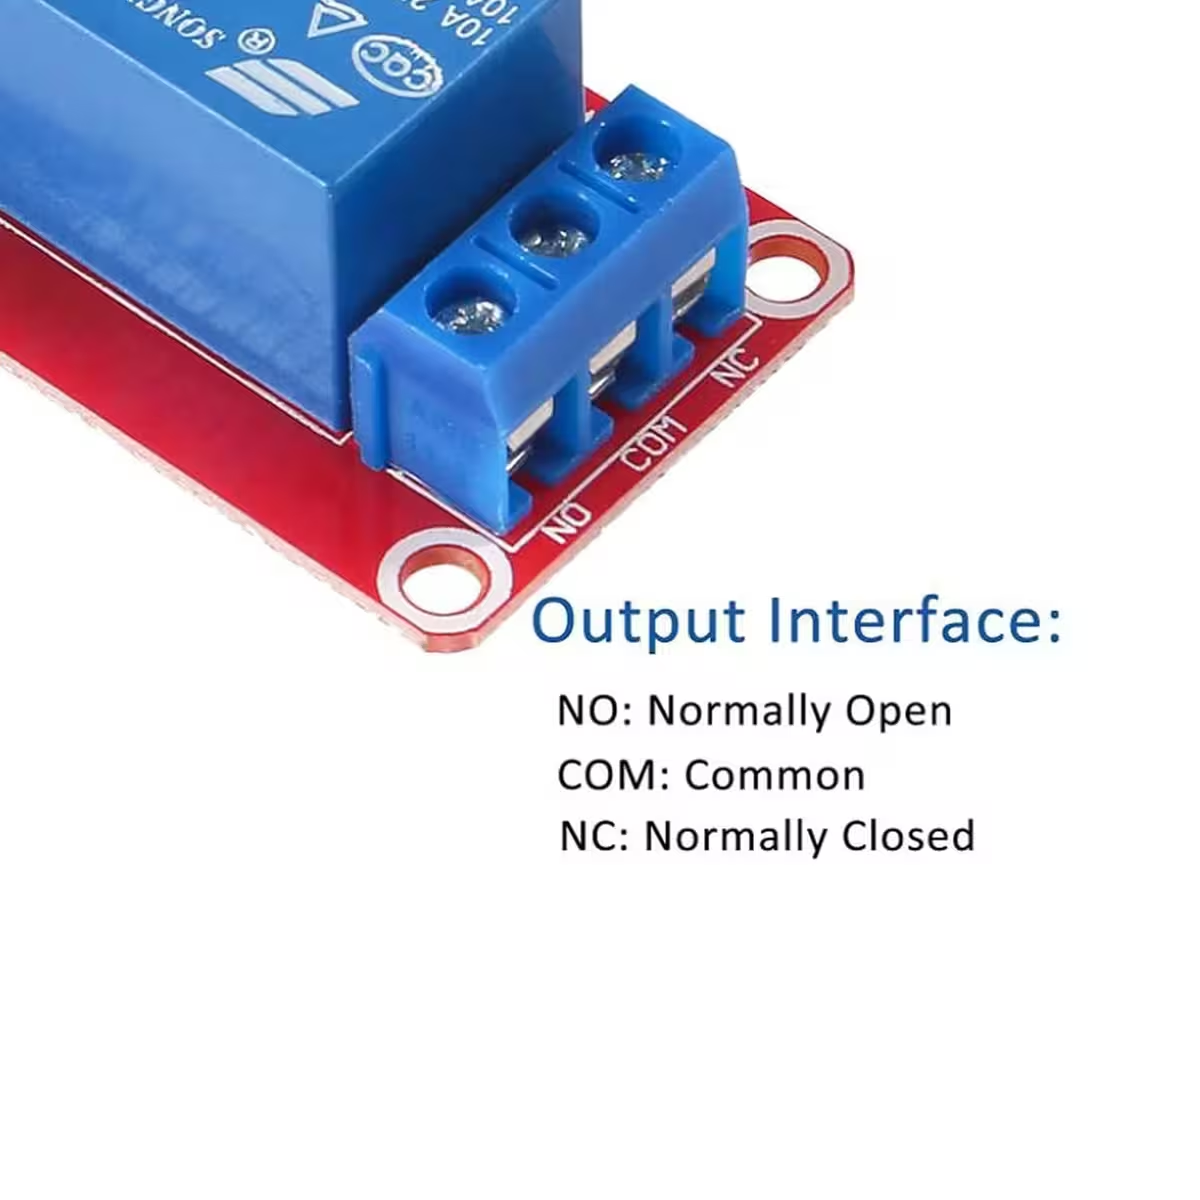
- Pre-installed screw terminals — Connect NC, C, NO, Coil+, and Coil- directly without soldering or extra adapters.
- 4-pack set — Perfect for multi-channel projects or keeping spares on hand for mission-critical systems.
Technical Specifications and Performance
The onboard optocoupler completely isolates the control circuit from the power side. The current on the Trigger line is only ~5 mA (on the 5V model), making it perfectly compatible with modern microcontroller logic levels without needing extra resistors. The relay coil is powered separately at 5V DC or 12V DC, depending on the version selected, while the contacts handle loads up to AC 250V / 10A. The 5V version integrates directly into USB-powered projects, while the 12V version is ideal for automotive systems, control panels, and 12V battery-powered setups.
| Parameter | Value / Detail |
|---|---|
| Coil Voltage | 5V DC or 12V DC (as selected) |
| Max Contact Load | AC 250V / 10A, DC 30V / 10A |
| Isolation Type | Optocoupler |
| Trigger Current | ≈5 mA (5V model) |
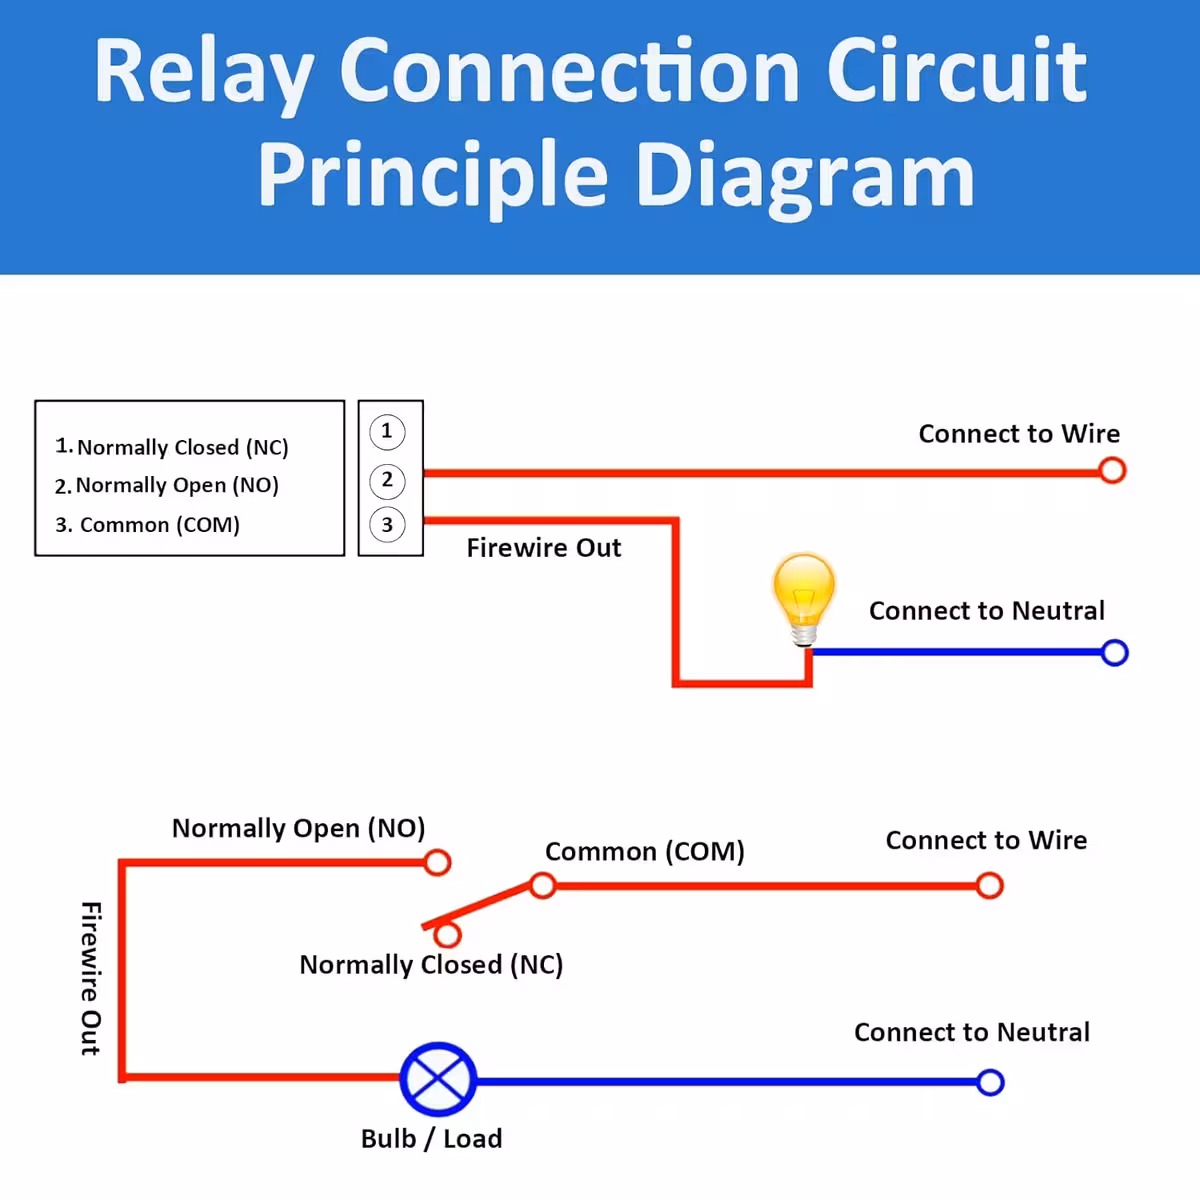
| Contact Type | NC (Normally Closed) / C (Common) / NO (Normally Open) |
| Module Inputs | Coil +, Coil –, Trigger |
| Trigger Selection | Jumper for High-Level / Low-Level Trigger |
| Compatibility | Arduino, Raspberry Pi, ESP32, ARM, PIC, AVR, MCU, CNC |
| Quantity | 4 units per set |
| Module Type | 1-Channel Relay Module |
Programming and Usage Instructions
- Connect Coil + and Coil – to the power supply matching your module version (5V or 12V DC).
- Connect the Trigger pin to a digital output pin on your microcontroller (GPIO, Arduino digital pin, etc.).
- Set the jumper to your desired position: High-Level Trigger (relay activates on HIGH signal) or Low-Level Trigger (relay activates on LOW signal).
- Connect your load to the NC/C (Normally Closed) or NO/C (Normally Open) terminals, depending on your application logic.
- Send the digital command from your code (e.g., digitalWrite(pin, HIGH) in Arduino IDE) to toggle the relay.
Package Contents
- 4 × 1-Channel Relay Module (5V or 12V — as selected)
- Pre-installed screw terminals on each module
Frequently Asked Questions
Does it work with a 3.3V trigger signal (e.g., Raspberry Pi, ESP32)?
In many cases, yes; the optocoupler will accept 3.3V on the trigger line. For guaranteed operation, use a 3.3V to 5V logic level shifter or check the optocoupler threshold in the datasheet. The coil power supply must remain at 5V or 12V, regardless of the logic voltage.
What is the practical difference between High-Level and Low-Level Trigger?
With High-Level Trigger, the relay activates when the trigger pin receives a HIGH signal. With Low-Level Trigger, it activates on LOW (GND). You can switch this behavior simply by moving the jumper — no wiring or code changes required.
Can I control 230V appliances, like a light or garden pump?
Yes. The contacts are rated for AC 250V / 10A, which is sufficient for most household loads. Ensure you do not exceed 10A and always follow standard electrical safety regulations when working with mains voltage.
Can I control all 4 modules from the same Arduino?
Yes. Each module requires only one digital pin for the trigger. An Arduino Uno has 14 digital pins, so you can independently control all 4 modules in the set while still having pins available for other peripherals.
Photo Gallery


Reviews
There are no reviews yet.